nginx经过多层代理后获取真实来源ip过程详解
这篇文章主要介绍了nginx经过多层代理后获取真实来源ip过程详解,文中通过示例代码介绍的非常详细,对大家的学习或者工作具有一定的参考学习价值,需要的朋友可以参考下
问题
nginx取 $remote_addr 当做真实ip,而事实上,$http_X_Forwarded_For 才是用户真实ip,$remote_addr只是代理上一层的地址
解决方案:
在 http 模块 加
?
1
2
3
set_real_ip_from 172.17.10.125; #上一层代理IP地址
real_ip_header X-Forwarded-For;
real_ip_recursive on;
添加之后启动nginx报错:
?
1
nginx: [emerg] unknown directive "set_real_ip_from" in /home/lnidmp/nginx/conf/nginx.conf:26
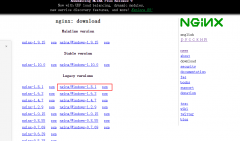
需要添加realip模块,重新编译nginx
1、cd /usr/local/nginx-1.15.12
2、./configure --prefix=http://www.zzvips.com/usr/cmcc/nginx --with-http_stub_status_module --with-http_ssl_module --with-http_realip_module
3、make && make install
温馨提示:
1、set_real_ip_from 是指接受从哪个信任前代理处获得真实用户ip
2、real_ip_header 是指从接收到报文的哪个http首部去获取前代理传送的用户ip
3、real_ip_recursive 是否递归地排除直至得到用户ip(默认为off)
首先,real_ip_header 指定一个http首部名称,默认是X-Real-Ip,假设用默认值的话,nginx在接收到报文后,会查看http首部X-Real-Ip。
(1)如果有1个IP,它会去核对,发送方的ip是否在set_real_ip_from指定的信任ip列表中。如果是被信任的,它会去认为这个X-Real-Ip中的IP值是前代理告诉自己的,用户的真实IP值,于是,它会将该值赋值给自身的$remote_addr变量;如果不被信任,那么将不作处理,那么$remote_addr还是发送方的ip地址。
(2)如果X-Real-Ip有多个IP值,比如前一方代理是这么设置的:proxy_set_header X-Real-Ip $proxy_add_x_forwarded_for;
得到的是一串IP,那么此时real_ip_recursive 的值就至关重要了。nginx将会从ip列表的右到左,去比较set_real_ip_from 的信任列表中的ip。
如果real_ip_recursive为off,那么,当最右边一个IP,发现是信任IP,即认为下一个IP(右边第二个)就是用户的真正IP;
如果real_ip_recursive为on,那么将从右到左依次比较,知道找到一个不是信任IP为止。
然后同样把IP值复制给$remote_addr。
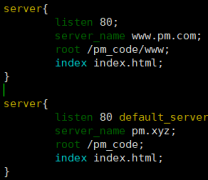
生产nginx配置文件如下:
?
1
2
3
4
5
6
7
8
9
10
11
12
13
14
15
16
17
18
19
20
21
22
23
24
25
26
27
28
29
30
31
32
33
34
35
36
37
38
39
40
41
42
43
44
45
46
47
48
49
50
51
52
53
54
55
56
57
58
59
user www;
worker_processes 10;
worker_rlimit_nofile 51200;
#error_log logs/error.log;
#error_log logs/error.log notice;
#error_log logs/error.log info;
error_log /data/logs/nginx_error.log crit;
#pid logs/nginx.pid;
events {
use epoll;
worker_connections 51200;
}
http {
include mime.types;
default_type application/octet-stream;
#log_format main '$remote_addr - $remote_user [$time_local] "$request" '
# '$status $body_bytes_sent "$http_referer" '
# '"$http_user_agent" "$http_x_forwarded_for"';
#access_log logs/access.log main;
server_names_hash_bucket_size 128;
server_tokens off;
expires 1h;
sendfile off;
tcp_nopush on;
fastcgi_connect_timeout 1200s;
fastcgi_send_timeout 1200s;
fastcgi_read_timeout 1200s;
fastcgi_buffer_size 128k;
fastcgi_buffers 8 128k;#8 128
fastcgi_busy_buffers_size 256k;
fastcgi_temp_file_write_size 256k;
keepalive_timeout 65;
tcp_nodelay on;
error_page 404 /;
gzip on;
gzip_min_length 2048;
gzip_buffers 4 16k;
gzip_http_version 1.1;
gzip_types text/plain css html application/xml application/x-javascript ;
set_real_ip_from 上一层代理IP地址;
real_ip_recursive on;
real_ip_header X-Forwarded-For;
log_format access '$remote_addr - $remote_user [$time_local] "$request" '
'$status $body_bytes_sent "$http_referer" '
'"$http_user_agent" $http_x_forwarded_for';
#################### include ################################################
include conf.d/*.conf;
}
相关热词:
本站内容来源于网络,如有侵权请与我们联系,我们会及时删除,我们深感抱歉!
注:本站所有信息仅供用于网络技术学习参考,学习中请遵循相关法律法规!
本文地址: https://v30.fanwenzhu.com/server/nginx/10455.shtml
相关文章
热门TAG
win10 ecshop 主机 阿里云 解决 配置 C# C++ 解析 SQL语句 命令 Go语言 方法 CSS3 HTML5 CSS win7 MSSQL 服务器配置 IIS7.5 IIS7 IIS6 IIS CentOS 7 Linux oracle数据库 oracle phpcms discuz discuz教程最新文章
-
 并且强制用 HTTPS 访问 fa
时间:2021-01-14
-
 可以控制访问量
时间:2021-01-14
-
 (通配符在前) ③server
时间:2021-01-14
-
 Nginx环境下WordPress的多站点
时间:2021-01-05
-
 nginx keepalive的具体使用
时间:2021-01-05
-
 Nginx的信号控制
时间:2021-01-05
-
 win10上安装nginx的方法步骤
时间:2020-12-29
-
 linux下 nginx监控问题
时间:2020-12-29
热门文章
-
可以控制访问量
时间:2021-01-14
-
Nginx环境下WordPress的多站点功能配置详解
时间:2021-01-05
-
 Nginx搭建负载均衡集群的实现
时间:2020-12-24
-
 使用Nginx实现灰度发布的使用
时间:2020-12-25
-
 nginx+tomcat 通过域名访问项目的实例
时间:2020-12-25
-
 Keepalived+Lvs+Nginx搭建Nginx高可用集群
时间:2020-12-23
-
 详解Nginx之Location配置(Location匹配顺序)
时间:2020-12-28
-
 详解基于centos7搭建Nginx网站服务器(包含
时间:2020-12-28
-
 详解Nginx如何配置Web服务器的示例代码
时间:2020-12-25
-
 自动化Nginx服务器的反向代理的配置方法
时间:2020-12-25