java_使用Post方式提交数据到Tomcat服务器的方法,我在上一篇文章中介绍了 使用
我在上一篇文章中介绍了 使用Get方式提交数据到Tomcat服务器,这篇将介绍使用Post方式提交数据到服务器,由于Post的方式和Get方式创建Web工程是一模一样的,只用几个地方的代码不同所以,我就直接介绍不同的地方,第一个不同点是,提交方式不同,所以修改LoginServlet.Java中的代码
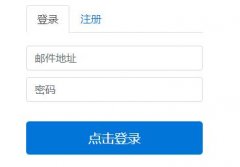
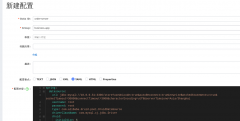
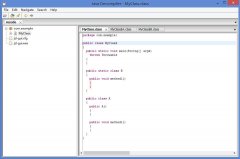
部署完成后在浏览器中输入:8080/WebProject/index.jsp,当浏览器中显示下图所示的界面表示项目成功的部署到了浏览器上package com.fyt.org; import java.io.IOException; import java.io.OutputStream; import java.io.PrintWriter; import javax.servlet.ServletException; import javax.servlet.http.HttpServlet; import javax.servlet.http.HttpServletRequest; import javax.servlet.http.HttpServletResponse; public class LoginServlet extends HttpServlet { public LoginServlet() { super(); } public void destroy() { super.destroy(); } //使用Get方式向服务器提交数据 public void doGet(HttpServletRequest request, HttpServletResponse response) throws ServletException, IOException { } //使用Post方式向服务器提交数据 public void doPost(HttpServletRequest request, HttpServletResponse response) throws ServletException, IOException { //获取从浏览器中发送过来的用户名 String username = request.getParameter("username"); //获取从客户端发送过来的密码 String password = request.getParameter("password"); //使用iso8859-1编码将username转换成字节数组 //再使用utf-8把字节数组转换成字符串 username = new String(username.getBytes("iso8859-1"), "utf-8"); //在控制台中打印用户名和密码 System.out.println("username=" + username); System.out.println("password=" + password); //获得一个输出流 OutputStream os = response.getOutputStream(); //如果用户名和密码都输入正确 if("小志".equals(username) && "123".equals(password)) { //将字符发送至浏览器中 os.write("登录成功".getBytes("utf-8")); } else { //将字符串发送到浏览器中 os.write("登录失败".getBytes("utf-8")); } } }
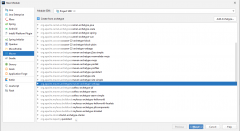
修改完成后将项目部署到Tomcat服务器上,部署方式可以参考我的博客使用Get方式提交数据到Tomcat服务器
第二个需要修改的地方是index.jsp,将index.jsp中的代码修改成下面的代码
关于使用Post方式提交数据到Tomcat服务器的方法就给大家介绍这么多,希望对大家有所帮助!
<%@ page language="java" import="java.util.*" pageEncoding="utf-8"%> <% String path = request.getContextPath(); String basePath = request.getScheme()+"://"+request.getServerName()+":"+request.getServerPort()+path+"https://www.xp.cn/"; %> <!DOCTYPE HTML PUBLIC "-//W3C//DTD HTML 4.01 Transitional//EN"> <html> <head> <base href="https://www.xp.cn/<%=basePath%>"> <title>My JSP 'index.jsp' starting page</title> <meta http-equiv="pragma" content="no-cache"> <meta http-equiv="cache-control" content="no-cache"> <meta http-equiv="expires" content="0"> <meta http-equiv="keywords" content="keyword1,keyword2,keyword3"> <!-- <link type="text/css" href="https://www.xp.cn/styles.css"> --> </head> <body> <form action="servlet/LoginServlet" method="post"> 用户名:<input type="text"><br> 密码:<input type="password"><br> <input type="submit" value="提交"> </form> </body> </html>
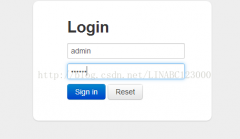
在用户名中输入小志,在密码中输入123,当浏览器中显示登录成功时表示登录成功,因为我在服务器中设置的正确的用户名是小志,正确的密码是123
当在用户名或者密码中有一项输入错误时会显示登录失败
本站内容来源于网络,如有侵权请与我们联系,我们会及时删除,我们深感抱歉!
注:本站所有信息仅供用于网络技术学习参考,学习中请遵循相关法律法规!
本文地址: https://v30.fanwenzhu.com/jiaob/java/6497.shtml
相关文章
热门TAG
win10 ecshop 主机 阿里云 解决 配置 C# C++ 解析 SQL语句 命令 Go语言 方法 CSS3 HTML5 CSS win7 MSSQL 服务器配置 IIS7.5 IIS7 IIS6 IIS CentOS 7 Linux oracle数据库 oracle phpcms discuz discuz教程最新文章
-
 Fitness fitness){ /*double X1=m
时间:2021-01-21
-
 所以这里也是需要注意的
时间:2021-01-21
-
 hadoop上传文件成果实例代
时间:2021-01-15
-
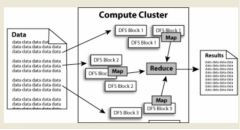 hadoop负责按key值将map的输
时间:2021-01-15
-
 记得勾选springconfig.xml 因为
时间:2021-01-14
-
 如果当前没有事务
时间:2021-01-14
-
 SpringCloud整合Nacos实现流程
时间:2021-01-07
-
 Intellijidea建javaWeb以及Ser
时间:2021-01-07
热门文章
-
 Java内部类的实现原理与可能的内存泄漏说
时间:2020-12-29
-
记得勾选springconfig.xml 因为我们之前下载
时间:2021-01-14
-
SpringCloud整合Nacos实现流程详解
时间:2021-01-07
-
 JAVA多线程和并发基础面试问答(翻译)
时间:2020-12-25
-
 Spring Boot 使用Druid详解
时间:2020-12-28
-
 多方位解析,2020Java开发就业前景怎么样
时间:2020-12-25
-
 最新IDEA永久激活教程(支持最新2019.2版本
时间:2020-12-25
-
Fitness fitness){ /*double X1=min+0.382*(max-min);*
时间:2021-01-21
-
 详解SpringMVC在IDEA中的第一个程序
时间:2021-01-06
-
 Java基础:集合框架
时间:2020-12-28