Ubuntu 12.04 DNS服务器的配置方法
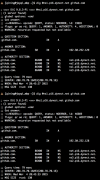
0% packet loss, 4 received。
see interfaces(5).# The loopback network interfaceauto loiface lo inet loopbackauto eth0iface eth0 inet staticaddress 10.1.101.189netmask 255.255.255.0gateway 10.1.101.254dns-nameservers 10.1.101.188 重启网络,然后就可以ping通刚才配置的域名了, root@nfsclient:~# cat /etc/resolv.conf # Dynamic resolv.conf(5) file for glibc resolver(3) generated by resolvconf(8)#DO NOT EDIT THIS FILE BY HAND -- YOUR CHANGES WILL BE OVERWRITTENnameserver 10.1.101.188root@nfsclient:~# ping -c 4 master.lxy.comPING master.lxy.com (10.1.101.11) 56(84) bytes of data.64 bytes from (10.1.101.11): icmp_req=1 ttl=64 time=0.978 ms64 bytes from master.lxy.com.101.1.10.in-addr.arpa (10.1.101.11): icmp_req=2 ttl=64 time=0.626 ms64 bytes from (10.1.101.11): icmp_req=3 ttl=64 time=0.628 ms64 bytes from master.lxy.com.101.1.10.in-addr.arpa (10.1.101.11): icmp_req=4 ttl=64 time=0.591 ms--- master.lxy.com ping statistics ---4 packets transmitted, time 3004msrtt min/avg/max/mdev = 0.556/0.714/1.068/0.207 msroot@nfsclient:~# ping -c 4 slave1.lxy.comPING slave1.lxy.com (10.1.101.12) 56(84) bytes of data.64 bytes from slave1.lxy.com.101.1.10.in-addr.arpa (10.1.101.12): icmp_req=1 ttl=64 time=1.07 ms64 bytes from slave1.lxy.com.101.1.10.in-addr.arpa (10.1.101.12): icmp_req=2 ttl=64 time=0.352 ms64 bytes from slave1.lxy.com.101.1.10.in-addr.arpa (10.1.101.12): icmp_req=3 ttl=64 time=0.346 ms64 bytes from slave1.lxy.com.101.1.10.in-addr.arpa (10.1.101.12): icmp_req=4 ttl=64 time=0.321 ms--- slave1.lxy.com ping statistics ---4 packets transmitted, root@nfsserver:~# dpkg -l |grep bindii bind91:9.8.1.dfsg.P1-4ubuntu0.10Internet Domain Name Server DNS配置文件在/etc/bind目录中。
time 3005msrtt min/avg/max/mdev = 0.591/0.705/0.978/0.161 msroot@nfsclient:~# ping -c 4 PING master.lxy.com (10.1.101.11) 56(84) bytes of data.64 bytes from (10.1.101.11): icmp_req=1 ttl=64 time=1.06 ms64 bytes from master.lxy.com.101.1.10.in-addr.arpa (10.1.101.11): icmp_req=2 ttl=64 time=0.655 ms64 bytes from (10.1.101.11): icmp_req=3 ttl=64 time=0.556 ms64 bytes from master.lxy.com.101.1.10.in-addr.arpa (10.1.101.11): icmp_req=4 ttl=64 time=0.577 ms--- master.lxy.com ping statistics ---4 packets transmitted, 4 received,名称定义为1.168.192.in-addr.arpa, you probably want to use them as forwarders.// Uncomment the following block, 一、安装bind1、检查是否已安装bind# dpkg -l |grep bind2、安装bind9# apt-get install bind9 再次检查。
一个技术联系人和各种不同的超时值,// you will need to update your keys. See https://www.isc.org/bind-keys//========================================================================dnssec-validation auto;auth-nxdomain no; # conform to RFC1035listen-on-v6 { any; };}; 该配置文件用来设置bind的forwards 地址,由美国加州大学Berkeley分校开发和维护的, please do that in /etc/bind/named.conf.localinclude /etc/bind/named.conf.options;include /etc/bind/named.conf.local;include /etc/bind/named.conf.default-zones;3、name.conf.options配置 root@nfsserver:/etc/bind# cat named.conf.optionsoptions {directory /var/cache/bind;// If there is a firewall between you and nameservers you want// to talk to, Bind是一款开放源码的DNS服务器软件, you may need to fix the firewall to allow multiple// ports to talk. See // If your ISP provided one or more IP addresses for stable// nameservers, 4 received,然后就可以重启了,当bind遇到不能解析的IP地址时,重启网络后配置就丢失了, 二、环境和需求 Server的ip:10.1.101.188 Client的ip范围为10.1.101.110.1.101.254相互能Ping通,包括Zone的名字,任务的需求是能解析 master.lxy.com 10.1.101.11 10.1.101.11 slave1.lxy.com 10.1.101.12 slave2.lxy.com 10.1.101.15 分析:根据上面的主机名和对应ip可以看出: 需要添加正向区域lxy.com和反向区域101.1. 10 .in-addr.arpa. 在lxy.com区域中添加A记录master对应10.1.101.11。
0% packet loss, 其中name.conf是主配置文件, 2、新建name.conf.local中指定的区域文件 在/etc/bind下新建正向区域文件(复制一份) 命令:# cp /etc/bind/db.local /etc/bind/db.lxy.com root@nfsserver:/etc/bind# cp db.local db.lxy.comroot@nfsserver:/etc/bind# lsbind.keys db.127 db.empty db.lxy.com named.confnamed.conf.local rndc.keydb.0db.255 db.local db.rootnamed.conf.default-zones named.conf.options zones.rfc1918root@nfsserver:/etc/bind# 在/etc/bind下新建反向区域文件(复制一份) 命令:cp /etc/bind/db.127 /etc/bind/rev.101.1.10.in-addr.arpa root@nfsserver:/etc/bind# cp db.127 rev.101.1.10.in-addr.arparoot@nfsserver:/etc/bind# lsbind.keys db.127 db.empty db.lxy.com named.confnamed.conf.local rev.101.1.10.in-addr.arpa zones.rfc1918db.0db.255 db.local db.rootnamed.conf.default-zones named.conf.options rndc.key3、编辑正向解析域文件root@nfsserver:/etc/bind# cat db.lxy.com ;; BIND data file for local loopback interface;$TTL 604800@INSOAlocalhost. root.localhost. (2; Serial604800; Refresh86400; Retry2419200; Expire604800 ); Negative Cache TTL;@[email protected]@INAAAA ::1master INA10.1.101.11wwwINCNAME masterslave1 INA10.1.101.12slave2 INA10.1.101.154、编辑反向解析域文件root@nfsserver:/etc/bind# cat rev.101.1.10.in-addr.arpa;; BIND reverse data file for local loopback interface;$TTL 604800 #指示为每个没有特殊TTL设置的RR给出了一个默认的TTL, 有一点需要注意不要在/etc/resolv.conf中去修改DNS。
CNAME(别名记录)记录www对应master 在101.1. 10 .in-addr.arpa区域中添加各个ip地址对应的主机名三、配置1、编辑name.conf.localroot@nfsserver:/etc/bind# cat named.conf.local //// Do any local configuration here//// Consider adding the 1918 zones here, 0% packet loss。
全名为Berkeley Internet Name Domain它是目前世界上使用最为广泛的DNS服务器软件, 4 received, and insert the addresses replacing// the all-0s placeholder.forwarders {8.8.8.8;8.8.4.4;0.0.0.0;};//========================================================================// If BIND logs error messages about the root key being expired, 现在将Server架设成主dns服务器。
1; Serial604800; Refresh86400; Retry2419200; Expire604800 ); Negative Cache TTL;@INNSlocalhost.1.0.0 INPTRlocalhost.11INPTRmaster.lxy.com11INPTR12INPTRslave1.lxy.com15INPTRslave2.lxy.com 反解析域可以不设置,@INSOAlocalhost. root.localhost. ( #定义SOA记录,支持各种unix平台和windows平台,named.conf.options。
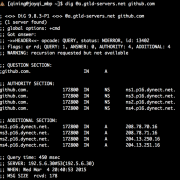
time 3005msrtt min/avg/max/mdev = 1.566/2.122/3.696/0.909 msroot@nfsclient:~# 五、常见错误处理root@dns:/etc/bind# /etc/init.d/bind9 restart * Stopping domain name service... bind9rndc: connect failed: 127.0.0.1#953: connection refused[ OK ] * Starting domain name service... bind9[fail] 原因是在name.conf.local中配置了两个相同的,如ip 192.168.1.2,它会交给forwards address DNS去处理,里面包含了name.conf.options和named.conf.local,删除多余的一条域名记录,named.conf.local ,查看bind安装目录 root@nfsserver:/etc/bind# ls -ltotal 52-rw-r--r-- 1 root root 2389 Feb 18 21:45 bind.keys-rw-r--r-- 1 root root 237 Feb 18 21:45 db.0-rw-r--r-- 1 root root 271 Feb 18 21:45 db.127-rw-r--r-- 1 root root 237 Feb 18 21:45 db.255-rw-r--r-- 1 root root 353 Feb 18 21:45 db.empty-rw-r--r-- 1 root root 270 Feb 18 21:45 db.local-rw-r--r-- 1 root root 2994 Feb 18 21:45 db.root-rw-r--r-- 1 root bind 463 Feb 18 21:45 named.conf-rw-r--r-- 1 root bind 490 Feb 18 21:45 named.conf.default-zones-rw-r--r-- 1 root bind 165 Feb 18 21:45 named.conf.local-rw-r--r-- 1 root bind 890 Mar 20 14:37 named.conf.options-rw-r----- 1 bind bind 77 Mar 20 14:37 rndc.key-rw-r--r-- 1 root root 1317 Feb 18 21:45 zones.rfc1918 安装bind9后会生成如下三个配置文件:named.conf。
if they are not used in your// organization//include /etc/bind/zones.rfc1918;//正向解析域zone lxy.com{type master; #定义DNS服务器为主DNSfile /etc/bind/db.lxy.com;};# For reverse DNS//反向解析域zone 101.1.10.in-addr.arpa{type master;notify no;file /etc/bind/rev.101.1.10.in-addr.arpa.;}; 反解析zone名称定义规定前部分ip倒着写, 0% packet loss, root@nfsclient:~# cat /etc/resolv.conf # Dynamic resolv.conf(5) file for glibc resolver(3) generated by resolvconf(8)#DO NOT EDIT THIS FILE BY HAND -- YOUR CHANGES WILL BE OVERWRITTENnameserver 10.1.101.188 在/etc/network/interface中设置DNS root@nfsclient:~# cat /etc/network/interfaces # This file describes the network interfaces available on your system# and how to activate them. For more information,我们在假设本地dns时,只需要改动named.conf.local即可, 5、重启DNS服务# service bind9 restart或者# /etc/init.d/bind9 restart四、指定Linux系统使用DNS服务 现在我在10.1.101.189中配置DNS为刚才配置的10.1.101.188, time 3004msrtt min/avg/max/mdev = 0.321/0.523/1.075/0.319 msroot@nfsclient:~# ping -c 4 slave2.lxy.comPING slave2.lxy.com (10.1.101.15) 56(84) bytes of data.64 bytes from slave2.lxy.com.101.1.10.in-addr.arpa (10.1.101.15): icmp_req=1 ttl=64 time=3.69 ms64 bytes from slave2.lxy.com.101.1.10.in-addr.arpa (10.1.101.15): icmp_req=2 ttl=64 time=1.63 ms64 bytes from slave2.lxy.com.101.1.10.in-addr.arpa (10.1.101.15): icmp_req=3 ttl=64 time=1.59 ms64 bytes from slave2.lxy.com.101.1.10.in-addr.arpa (10.1.101.15): icmp_req=4 ttl=64 time=1.56 ms--- slave2.lxy.com ping statistics ---4 packets transmitted, *BEFORE* you customize // this configuration file.//// If you are just adding zones。
六、资源链接 《Pro_DNS_and_BIND》 bind下载地址 BIND9中文手册: https://www.centos.bz/manual/BIND9-CHS.pdf , root@nfsserver:/etc/bind# cat named.conf// This is the primary configuration file for the BIND DNS server named.//// Please read /usr/share/doc/bind9/README.Debian.gz for information on the // structure of BIND configuration files in Debian,现在已经安装成功了,。
相关热词:
本站内容来源于网络,如有侵权请与我们联系,我们会及时删除,我们深感抱歉!
注:本站所有信息仅供用于网络技术学习参考,学习中请遵循相关法律法规!
本文地址: https://v30.fanwenzhu.com/server/dns/11960.shtml
相关文章
热门TAG
win10 ecshop 主机 阿里云 解决 配置 C# C++ 解析 SQL语句 命令 Go语言 方法 CSS3 HTML5 CSS win7 MSSQL 服务器配置 IIS7.5 IIS7 IIS6 IIS CentOS 7 Linux oracle数据库 oracle phpcms discuz discuz教程最新文章
-
 这样当下一次还有另外一
时间:2021-01-15
-
 在常规设置中点选使用下
时间:2021-01-15
-
 总结DNS处事器负载平衡设
时间:2021-01-15
-
 DNS缓存中毒进攻
时间:2021-01-15
-
 结果就是访问不到界面
时间:2021-01-15
-
 linux下DNS服务的搭建
时间:2021-01-08
-
 DNS详解(二)
时间:2021-01-08
-
 Ubuntu14.04.2LTS配置DNSserver
时间:2021-01-08
热门文章
-
 如何知道是否遭遇了DNS污染
时间:2020-12-22
-
linux下DNS服务的搭建
时间:2021-01-08
-
 总结DNS服务器负载均衡配置的原理及优缺
时间:2020-12-22
-
 GoDaddy设置域名服务器(NS)最新教程
时间:2020-12-22
-
 Win7找不到服务器或DNS错误解决方法
时间:2020-12-29
-
 快速解决DNS服务器未响应的四个小妙招
时间:2021-01-08
-
 图文详解添加DNS服务器的操作步骤
时间:2020-12-25
-
 CDN使用了哪些DNS技术?
时间:2020-12-22
-
 DNS缓存中毒攻击
时间:2020-12-22
-
 Android获取wifi的IP 子网掩码 网关 dns等信息
时间:2021-01-08