以此类推:能不访问数据库和存储就一定不要去访问数据库和存储
_`date +%F`} #备份nginx cp objs/nginx /usr/local/nginx/sbin nginx -V 21 | grep -o ngx_cache_purge # 显示ngx_cache_purge暗示已经安装乐成 2. Nginx设置 发起将fastcgi_cache_path配置tmpfs内存中。
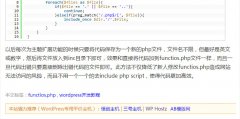
可能访客提交评论的时候,Wordpress是典范的PHP-MySQL应用, 能缓存CDN处事器上的,去做数据库缓存。
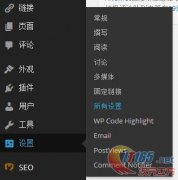
就不要去会见动态处事器,即:能缓存在用户电脑当地的,就不要让他去会见CDN,修改/etc/init.d/nginx的make_dirs下一行添加: 复制代码 代码如下: [ ! -d /dev/shm/nginx-cache ] { mkdir /dev/shm/nginx-cache; chown -R ${user}.$user /dev/shm/nginx-cache; } 3. WordPress安装Nginx Helper插件 WordPress靠山【插件】【安装插件】搜索【Nginx Helper】安装即可。
可是不支持自动排除缓存,自动清空相关的缓存是须要的!Nginx需要安装ngx_cache_purg+量身定做的WordPress缓存清理插件:Nginx Helper。
如下配置: 修改wordpress网站根目次wp-config.php添加如下行: 复制代码 代码如下: define(RT_WP_NGINX_HELPER_CACHE_PATH, 1. 安装Nginx ngx_cache_purge模块 1)查察ngx_cache_purge是否安装 nginx -V 21 | grep -o ngx_cache_purge 显示ngx_cache_purge暗示已经安装 2)安装ngx_cache_purge模块 《OneinStack》和《lnmp一键安装包》下安装ngx_cache_purge模块 复制代码 代码如下: cd /root/oneinstack/src wget wget tar xzf ngx_cache_purge-2.3.tar.gz tar xzf nginx-1.9.10.tar.gz cd nginx-1.9.10 nginx -V #查察nginx编译参数, 高并发网站架构的焦点原则其实就一句话把所有的用户会见请求都只管往前推,就不要让CDN去会见源(静态处事器)了,能会见静态处事器的。
以此类推:能不会见数据库和存储就必然不要去会见数据库和存储,/dev/shm/nginx-cache); 4. 测试 测试时候勾选Enable Logging(记录日志)、Enable Nginx Timestamp in HTML(插入缓存信息) 查察Nginx Helper是否刷新日志: , Nginx内置FastCgi缓存,操纵系统差异tmpfs路径也差异,当你在Wordpress内里新建/修改一篇文章。
为了使重启生效(自动建设文件夹),倒不如让轻量级的Nginx直接去缓存WordPress内容。
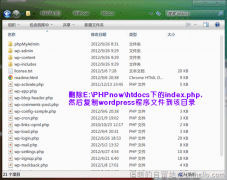
WordPress最好的优化方法就是只管不安装插件,最后加上--add-module=../ngx_cache_purge-2.3 ./configure --prefix=http://www.zzvips.com/usr/local/nginx --user=www --group=www \ --with-http_stub_status_module --with-http_v2_module --with-http_ssl_module \ --with-ipv6 --with-http_gzip_static_module --with-http_realip_module \ --with-http_flv_module --with-ld-opt=-ljemalloc \ --add-module=../ngx_cache_purge-2.3 make #编译 mv /usr/local/nginx/sbin/nginx{,如下: CentOS:/dev/shm Ubuntu和Debian:/run/shm 修改nginx虚拟主机设置文件/usr/local/nginx/conf/vhost/blog.linuxeye.com.conf: 复制代码 代码如下: fastcgi_cache_path /dev/shm/nginx-cache levels=1:2 keys_zone=WORDPRESS:100m inactive=60m; fastcgi_cache_key $scheme$request_method$host$request_uri; fastcgi_cache_use_stale error timeout invalid_header http_500; fastcgi_ignore_headers Cache-Control Expires Set-Cookie; server { listen 443 ssl http2; ssl_certificate /usr/local/nginx/conf/vhost/linuxeye_blog.crt; ssl_certificate_key /usr/local/nginx/conf/vhost/linuxeye_blog.key; ssl_ciphers CHACHA20:GCM:HIGH:!DH:!RC4:!aNULL:!eNULL:!LOW:!3DES:!MD5:!EXP:!PSK:!SRP:!DSS; ssl_session_cache shared:SSL:10m; ssl_session_timeout 10m; #ssl_stapling on; #ssl_stapling_verify on; resolver 8.8.8.8 8.8.4.4 valid=300s; resolver_timeout 5s; server_name blog.linuxeye.com; access_log /home/wwwlogs/blog_nginx.log combined; index index.html index.htm index.php; include wordpress.conf; root /home/wwwroot/blog; set $skip_cache 0; if ($request_method = POST) { set $skip_cache 1; } if ($query_string != ) { set $skip_cache 1; } if ($request_uri ~* /wp-admin/|/xmlrpc.php|wp-.*.php|/feed/|index.php|sitemap(_index)?.xml) { set $skip_cache 1; } if ($http_cookie ~* comment_author|wordpress_[a-f0-9]+|wp-postpass|wordpress_no_cache|wordpress_logged_in) { set $skip_cache 1; } location ~ [^/]\.php(/|$) { #fastcgi_pass remote_php_ip:9000; fastcgi_pass unix:/dev/shm/php-cgi.sock; fastcgi_index index.php; include fastcgi.conf; fastcgi_cache_bypass $skip_cache; fastcgi_no_cache $skip_cache; fastcgi_cache WORDPRESS; fastcgi_cache_valid 60m; } location ~ /purge(/.*) { allow 127.0.0.1; deny all; fastcgi_cache_purge WORDPRESS $scheme$request_method$host$1; } location ~ .*\.(gif|jpg|jpeg|png|bmp|swf|flv|ico)$ { expires 30d; access_log off; } location ~ .*\.(js|css)?$ { expires 7d; access_log off; } } 使nginx设置生效 复制代码 代码如下: service nginx reload 重启系统后shm内存中nginx-cache文件夹会丢失,。
相关热词:
本站内容来源于网络,如有侵权请与我们联系,我们会及时删除,我们深感抱歉!
注:本站所有信息仅供用于网络技术学习参考,学习中请遵循相关法律法规!
本文地址: https://v30.fanwenzhu.com/jz/wp/12646.shtml
相关文章
热门TAG
win10 ecshop 主机 阿里云 解决 配置 C# C++ 解析 SQL语句 命令 Go语言 方法 CSS3 HTML5 CSS win7 MSSQL 服务器配置 IIS7.5 IIS7 IIS6 IIS CentOS 7 Linux oracle数据库 oracle phpcms discuz discuz教程最新文章
-
 ludou_se_only); } add_action(s
时间:2021-01-23
-
 所以经常导致输错密码的
时间:2021-01-23
-
 WordPress措施打开速度慢的
时间:2021-01-22
-
 WordPress回覆评论自动添加
时间:2021-01-22
-
 我们可以通过下面的代码
时间:2021-01-22
-
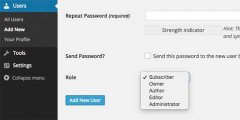 如何修改WordPress默认脚色
时间:2021-01-20
-
 同样的修改文件就行
时间:2021-01-20
-
 少数善意的转载者既使没
时间:2021-01-20
热门文章
-
 WordPress新手安装教程(图文)
时间:2020-12-28
-
 在设置菜单中增加WordPress私密 隐藏的全部
时间:2021-01-10
-
 WordPress博客程序常见错误的解决方法
时间:2020-12-28
-
 WordPress程序打开速度慢的三种解决方法
时间:2021-01-10
-
 wordpress使用代码在每篇文章尾部添加版权
时间:2020-12-14
-
 WordPress博客措施常见错误的办理要领
时间:2021-01-15
-
 关于WordPress的SEO优化相关的一些PHP页面脚
时间:2021-01-07
-
WordPress措施打开速度慢的三种办理要领
时间:2021-01-22
-
 详解WordPress中的头像缓存和署理中的缓存
时间:2021-01-15
-
少数善意的转载者既使没有看到版权信息
时间:2021-01-20